

1、单个像素(画点)
利用pygame画点主要有三种方法:
方法一:画长宽为1个像素的正方形
import pygame,sys
pygame.init()
screen=pygame.display.set_caption('hello world!')
screen=pygame.display.set_mode([640,480])
screen.fill([255,255,255])
pygame.draw.rect(screen,[0,0,0],[150,50,1,1],1) #画1*1的矩形,线宽为1,这里不能是0,因为1*1无空白区域。
pygame.display.flip()
while True:
for event in pygame.event.get():
if event.type==pygame.QUIT:
sys.exit()
</div>
方法二:画个直径为1的圆
import pygame,sys
pygame.init()
screen=pygame.display.set_caption('hello world!')
screen=pygame.display.set_mode([640,480])
screen.fill([255,255,255])
pygame.draw.circle(screen,[0,0,0],[150,200],1,1)
pygame.display.flip()
while True:
for event in pygame.event.get():
if event.type==pygame.QUIT:
sys.exit()
</div>
方法三:这种方法并不是画上去的,而是改变了surface上某个点的颜色,这样看上去像是画了一个点screen.set_at()。另外,如果要得到某个像素的颜色,可以使用screen.get_at()。
import pygame,sys
pygame.init()
screen=pygame.display.set_caption('hello world!')
screen=pygame.display.set_mode([640,480])
screen.fill([255,255,255])
screen.set_at([150,150],[255,0,0])#将150,150改为红色。
pygame.display.flip()
while True:
for event in pygame.event.get():
if event.type==pygame.QUIT:
sys.exit()
</div>
2、连接多个点形成线
pygame.draw.lines()方法可以将多个点连接成为线。该方法有5个参数:surface表面、颜色、闭合线或者非闭合线(如果闭合为True,否则为False),点的列表,线宽。pygame.draw.lines(surface,[color],False/True,plotpoints,1)。下面的例子画出了一条马路,具体如下:
import pygame,sys
def lineleft(): #画马路左边界
plotpoints=[]
for x in range(0,640):
y=-5*x+1000
plotpoints.append([x,y])
pygame.draw.lines(screen,[0,0,0],False,plotpoints,5)
pygame.display.flip()
def lineright():#画马路右边界
plotpoints=[]
for x in range(0,640):
y=5*x-2000
plotpoints.append([x,y])
pygame.draw.lines(screen,[0,0,0],False,plotpoints,5)
pygame.display.flip()
def linemiddle():#画马路中间虚线
plotpoints=[]
x=300
for y in range(0,480,20):
plotpoints.append([x,y])
if len(plotpoints)==2:
pygame.draw.lines(screen,[0,0,0],False,plotpoints,5)
plotpoints=[]
pygame.display.flip()
pygame.init()
screen=pygame.display.set_caption('hello world!')
screen=pygame.display.set_mode([640,480])
screen.fill([255,255,255])
lineleft()
lineright()
linemiddle()
while True:
for event in pygame.event.get():
if event.type==pygame.QUIT:
sys.exit()
</div>
3、引用图像
在pygame中引用图像最简单的以夷伐夷是image函数。下面在马路的实例中,加入一辆汽车。首先pygame.image.load()函数从硬盘加载一个图像,并创建一个名为my_car的对象。这里,my_car是一个surface,不过是存在内存中,并未显示出来,然后用blit(块移)方法将my_car复制到screen表面上,从而显示出来。具体代码如下:
import pygame,sys
def lineleft():
plotpoints=[]
for x in range(0,640):
y=-5*x+1000
plotpoints.append([x,y])
pygame.draw.lines(screen,[0,0,0],False,plotpoints,5)
pygame.display.flip()
def lineright():
plotpoints=[]
for x in range(0,640):
y=5*x-2000
plotpoints.append([x,y])
pygame.draw.lines(screen,[0,0,0],False,plotpoints,5)
pygame.display.flip()
def linemiddle():
plotpoints=[]
x=300
for y in range(0,480,20):
plotpoints.append([x,y])
if len(plotpoints)==2:
pygame.draw.lines(screen,[0,0,0],False,plotpoints,5)
plotpoints=[]
pygame.display.flip()
def loadcar(): #载入car图像
my_car=pygame.image.load('ok1.jpg') #当前文件夹下的ok1.jpg文件
screen.blit(my_car,[320,320])
pygame.display.flip()
pygame.init()
screen=pygame.display.set_caption('hello world!')
screen=pygame.display.set_mode([640,480])
screen.fill([255,255,255])
lineleft()
lineright()
linemiddle()
loadcar()
while True:
for event in pygame.event.get():
if event.type==pygame.QUIT:
sys.exit()
</div>
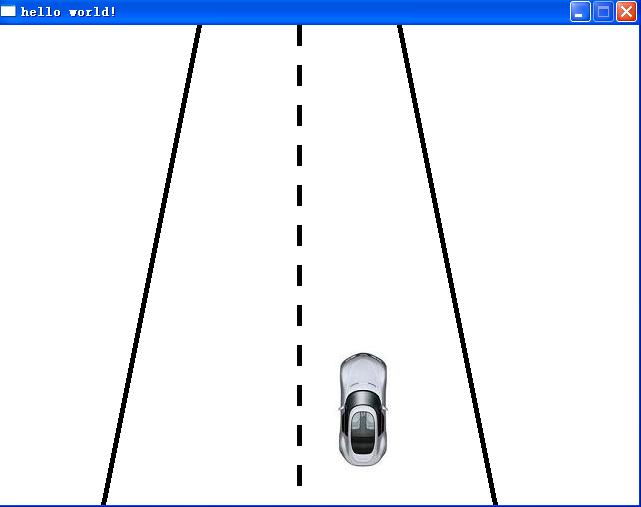
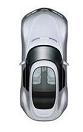
素材:ok1.jpg
4、动画
计算机动画实际上就是把图像从一个地方移动到另一个地方,同时几个连接动作交待显示就会产生逼真的效果。因此,在做动画中,最基本要考虑的因素主要是三个,一是时间,什么时间移动,多长时间变下一个动作,二是位置,从什么位置到什么位置,三是动作,前后两个动作的连续性。在这个例子中,因为车是俯视的,所以车轮转动实际是看不到的,所以不用考虑连续动作的变化,而是只考虑车的位置和多长时间移动即可。第一步pygame.time.delay()来实现时间延迟;第二步利用pygame.draw.rect()把原来位置的图像覆盖掉;第三步screen.blit()在新位置引入图像。下面的例子实现了汽车从驶入到驶出的过程。
import pygame,sys
def lineleft():
plotpoints=[]
for x in range(0,640):
y=-5*x+1000
plotpoints.append([x,y])
pygame.draw.lines(screen,[0,0,0],False,plotpoints,5)
pygame.display.flip()
def lineright():
plotpoints=[]
for x in range(0,640):
y=5*x-2000
plotpoints.append([x,y])
pygame.draw.lines(screen,[0,0,0],False,plotpoints,5)
pygame.display.flip()
def linemiddle():
plotpoints=[]
x=300
for y in range(0,480,20):
plotpoints.append([x,y])
if len(plotpoints)==2:
pygame.draw.lines(screen,[0,0,0],False,plotpoints,5)
&nb