

先给大家展示下效果如图,感觉还很满意请继续阅读全文:
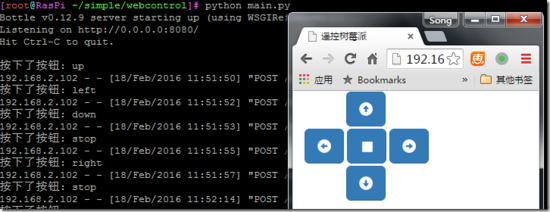
用到的知识:Python Bottle HTML Javascript JQuery Bootstrap AJAX 当然还有 linux
我去,这么多……我还是一点一点说起吧……
先贴最终的源代码:
#!/usr/bin/env python3
from bottle import get,post,run,request,template
@get("/")
def index():
return template("index")
@post("/cmd")
def cmd():
print("按下了按钮: "+request.body.read().decode())
return "OK"
run(host="0.0.0.0")
</div>
没错,就10句,我一句一句解释:
1. # !/usr/bin/env python3 ,告诉shell这个文件是Python源代码,让bash调用python3来解释这段代码
2. from bottle import get,post,run,request,template ,从bottle框架导入了我用到的方法、对象
下边几句是定义了2个路由,一个是“/”一个是“/cmd”,前者是get类型(用@get装饰),后者是POST类型(用的@post装饰)
第一个路由很简单,就是读取index模版(模版就是个html啦)并发送到客户端(浏览器),因为路径是“/”也就是比如树莓派的IP地址是:192.168.0.10
那用 http://192.168.0.10:8080 就访问到了我们的"/”路由(bottle默认端口是8080)
同理,第二个路由的路径是“/cmd”也就是访问 http://192.168.0.10:8080/cmd 就访问到了第二个路由
最后一句: run(host = " 0.0.0.0 " )就是调用bottle的run方法,建立一个http服务器,让我们能通过浏览器访问我们的界面。
下边我详细的解释一下这些代码的作用:
第一个路由的作用就是扔给浏览器一个HTML(index.tpl)文档,显示这个界面:
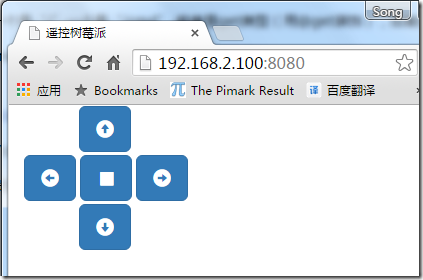
这个文件的源代码如下:
<!DOCTYPE html>
<html lang="en">
<head>
<meta charset="UTF-8">
<meta name="viewport" content="width=device-width, initial-scale=1.0">
<title>遥控树莓派</title>
<link href="//cdn.bootcss.com/bootstrap/3.3.5/css/bootstrap.min.css" rel="stylesheet" media="screen">
<script src="http://code.jquery.com/jquery.js"></script>
<style type="text/css">
#up {
margin-left: 55px;
margin-bottom: 3px;
}
#down {
margin-top: 3px;
margin-left: 55px;
}
</style>
<script>
$(function(){
$("button").click(function(){
$.post("/cmd",this.id,function(data,status){});
});
});
</script>
</head>
<body>
<div id="container" class="container">
<div>
<button id="up" class="btn btn-lg btn-primary glyphicon glyphicon-circle-arrow-up"></button>
</div>
<div>
<button id='left' class="btn btn-lg btn-primary glyphicon glyphicon-circle-arrow-left"></button>
<button id='stop' class="btn btn-lg btn-primary glyphicon glyphicon-stop"></button>
<button id='right' class="btn btn-lg btn-primary glyphicon glyphicon-circle-arrow-right"></button>
</div>
<div>
<button id='down' class="btn btn-lg btn-primary glyphicon glyphicon-circle-arrow-down"></button>
</div>
</div>
<script src="//cdn.bootcss.com/bootstrap/3.3.5/js/bootstrap.min.js"></script>
</body>
</html>
</div>
这个内容有点多,不过很简单,就是引用了jquery bootstrap这两个前端框架,加了5个按钮(<body></body>之间的代码)。当然我用了bootstrap内置的上下左右停止这几个图标,这5个按钮的id分辨定义成up,down,left,right,stop,然后写了如下的关键代码:
$(function(){
$("button").click(function(){
$.post("/cmd",this.id,function(data,status){});
});
});
</div>
没错,就这三句代码……
第1,2行给所有的按钮(button)绑定了一个点击的事件,第三行调用jquery的post方法把this.id(被单击按钮的id),发送到“/cmd”这个路径下,这时,我们python代码的第二个路由起作用了,接收到了网页上被单击按钮的id,并打印出了“按下了按钮: XXX”
当然,在这里写几个if语句判断,就可以按照实际的需求做一些实际的控制了,嗯,比如调用wiringpi2 for python控制树莓派的GPIO。
关于使用Python简单的实现树莓派的WEB控制的相关内容就给大家介绍这么多,希望对大家有所帮助!
</div>